Overview
This guide covers the physical installation and initial network commissioning of the C-Bridge gateway. Follow these steps before proceeding to the First-Time Setup guide.
C-Bridge is designed for flexible deployment in commercial environments and supports ceiling-mounted, wall-mounted, and IT closet installations.
Pre-Installation Requirements
Before beginning, confirm the following:
- A commissioned Casambi network is already active in the space
- A stable internet connection is available at the installation location (Ethernet strongly recommended)
- A manufacturer-approved power supply matching the device label is available
- The installation location has been selected with Bluetooth coverage in mind
- A mobile device or laptop is available for initial network setup if needed
Choosing an Installation Location
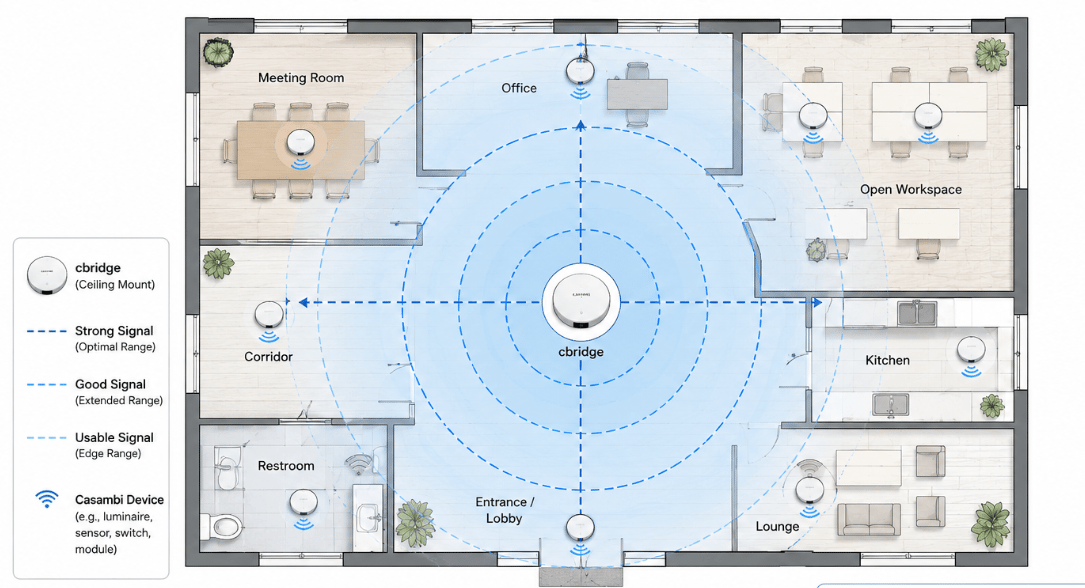
The C-Bridge unit communicates with the Casambi network via Bluetooth. Placement significantly affects reliability.
Recommended Placement
- Centrally within the Casambi wireless network coverage area
- Ceiling-mounted for maximum Bluetooth signal distribution
- Minimal obstructions: avoid concrete walls, metal ceilings, and electrical panels
- At least 1 metre away from high-interference sources (Wi-Fi access points, large motors)
Alternative Locations
- Wall-mounted — acceptable if central placement isn't possible
- IT closet or other room — only if strong Bluetooth coverage has been confirmed with a site survey
Do not install inside an enclosed metal cabinet. Metal enclosures block Bluetooth signal and will prevent communication with Casambi devices.
Mounting the Device
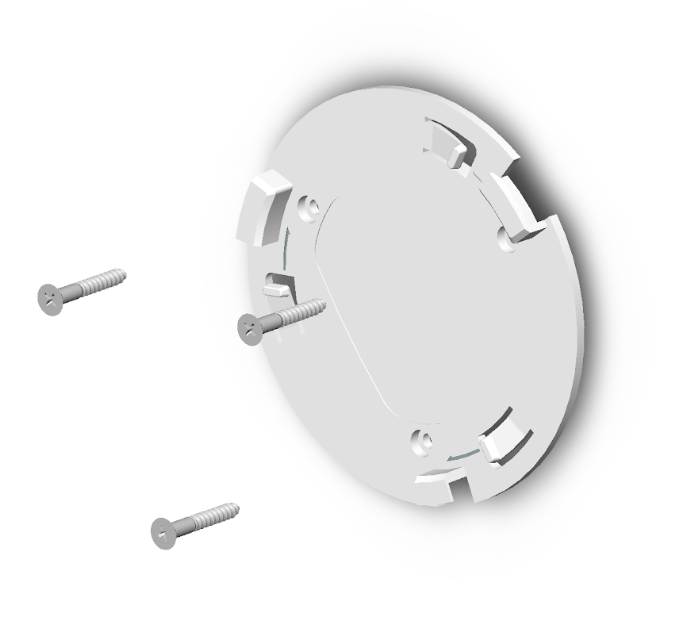
The C-Bridge unit ships with a mounting bracket, screws, and wall anchors.
Ceiling or Wall Mount
- Mark the mounting position — ensure it is centered in your coverage area
- Attach the mounting bracket to the surface using the provided screws and anchors
- Run the Ethernet cable and power cable to the mounting position before attaching the device
- Align the three clips on the back of the C-Bridge unit with the bracket slots
- Rotate the device clockwise until it clicks and locks into place
- Confirm the device does not move or wiggle — it should be firmly secured
Power Connection
- Connect the power supply to the C-Bridge unit's power input
- Use the manufacturer-approved power supply specified for your model
- Avoid using consumer phone chargers or unrated adapters
- The LED indicator should illuminate once power is connected
Power LED on = device is receiving power and beginning boot sequence
Ethernet Connection
Ethernet is strongly recommended for production deployments.
- Connect an Ethernet cable from the C-Bridge unit to your network switch or router
- Ensure the network provides either:
- DHCP (default — the device will receive an IP automatically), or
- A pre-configured static IP (if required by your network team)
Why Ethernet over Wi-Fi?
- More stable connection for continuous 24/7 operation
- Faster initial setup
- Recommended for reliable BACnet and API integrations
- Not affected by RF interference in the space
First Boot
Once powered on with Ethernet connected:
- The device boots automatically — no button presses required
- Boot time is typically 1–2 minutes
- Status LEDs cycle through patterns during boot
- Confirm readiness by opening the local interface; indicator patterns vary by hardware revision
During boot, the system:
- Starts all backend services
- Initialises communication interfaces
- Connects to the local network via DHCP (or static IP)
- Prepares the web interface for access
Wi-Fi Setup (SoftAP Mode)
If Ethernet is not connected, or if Wi-Fi is preferred:
- The device will broadcast a temporary Wi-Fi network named
CBridge_Setup_XXXX - Connect to this network with a mobile device or laptop
- Open a browser and navigate to
http://192.168.4.1 - Select your local Wi-Fi network from the list
- Enter the Wi-Fi password and click Save
- The device will reboot and connect to the selected network
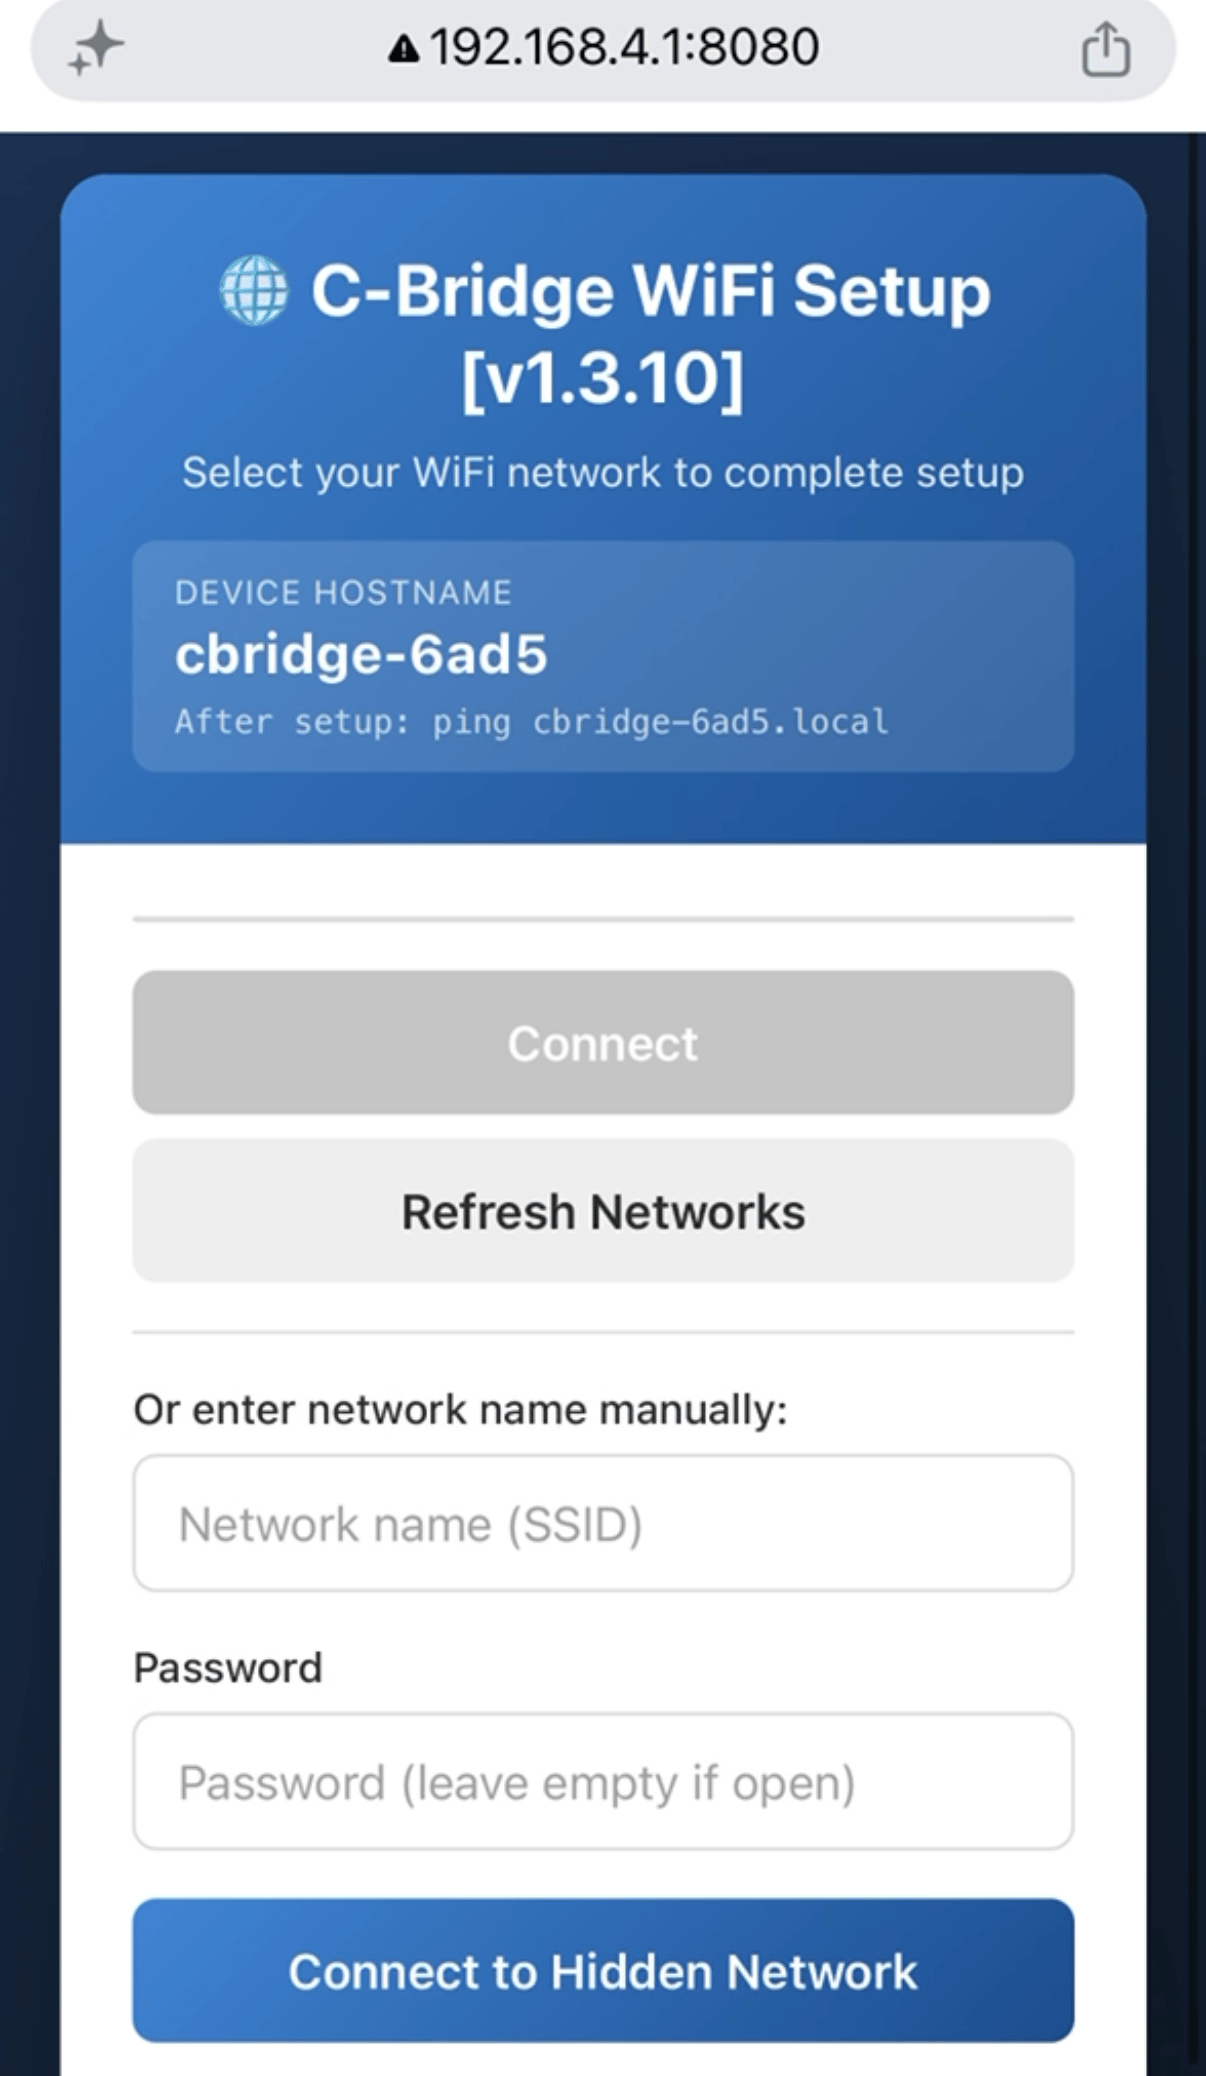
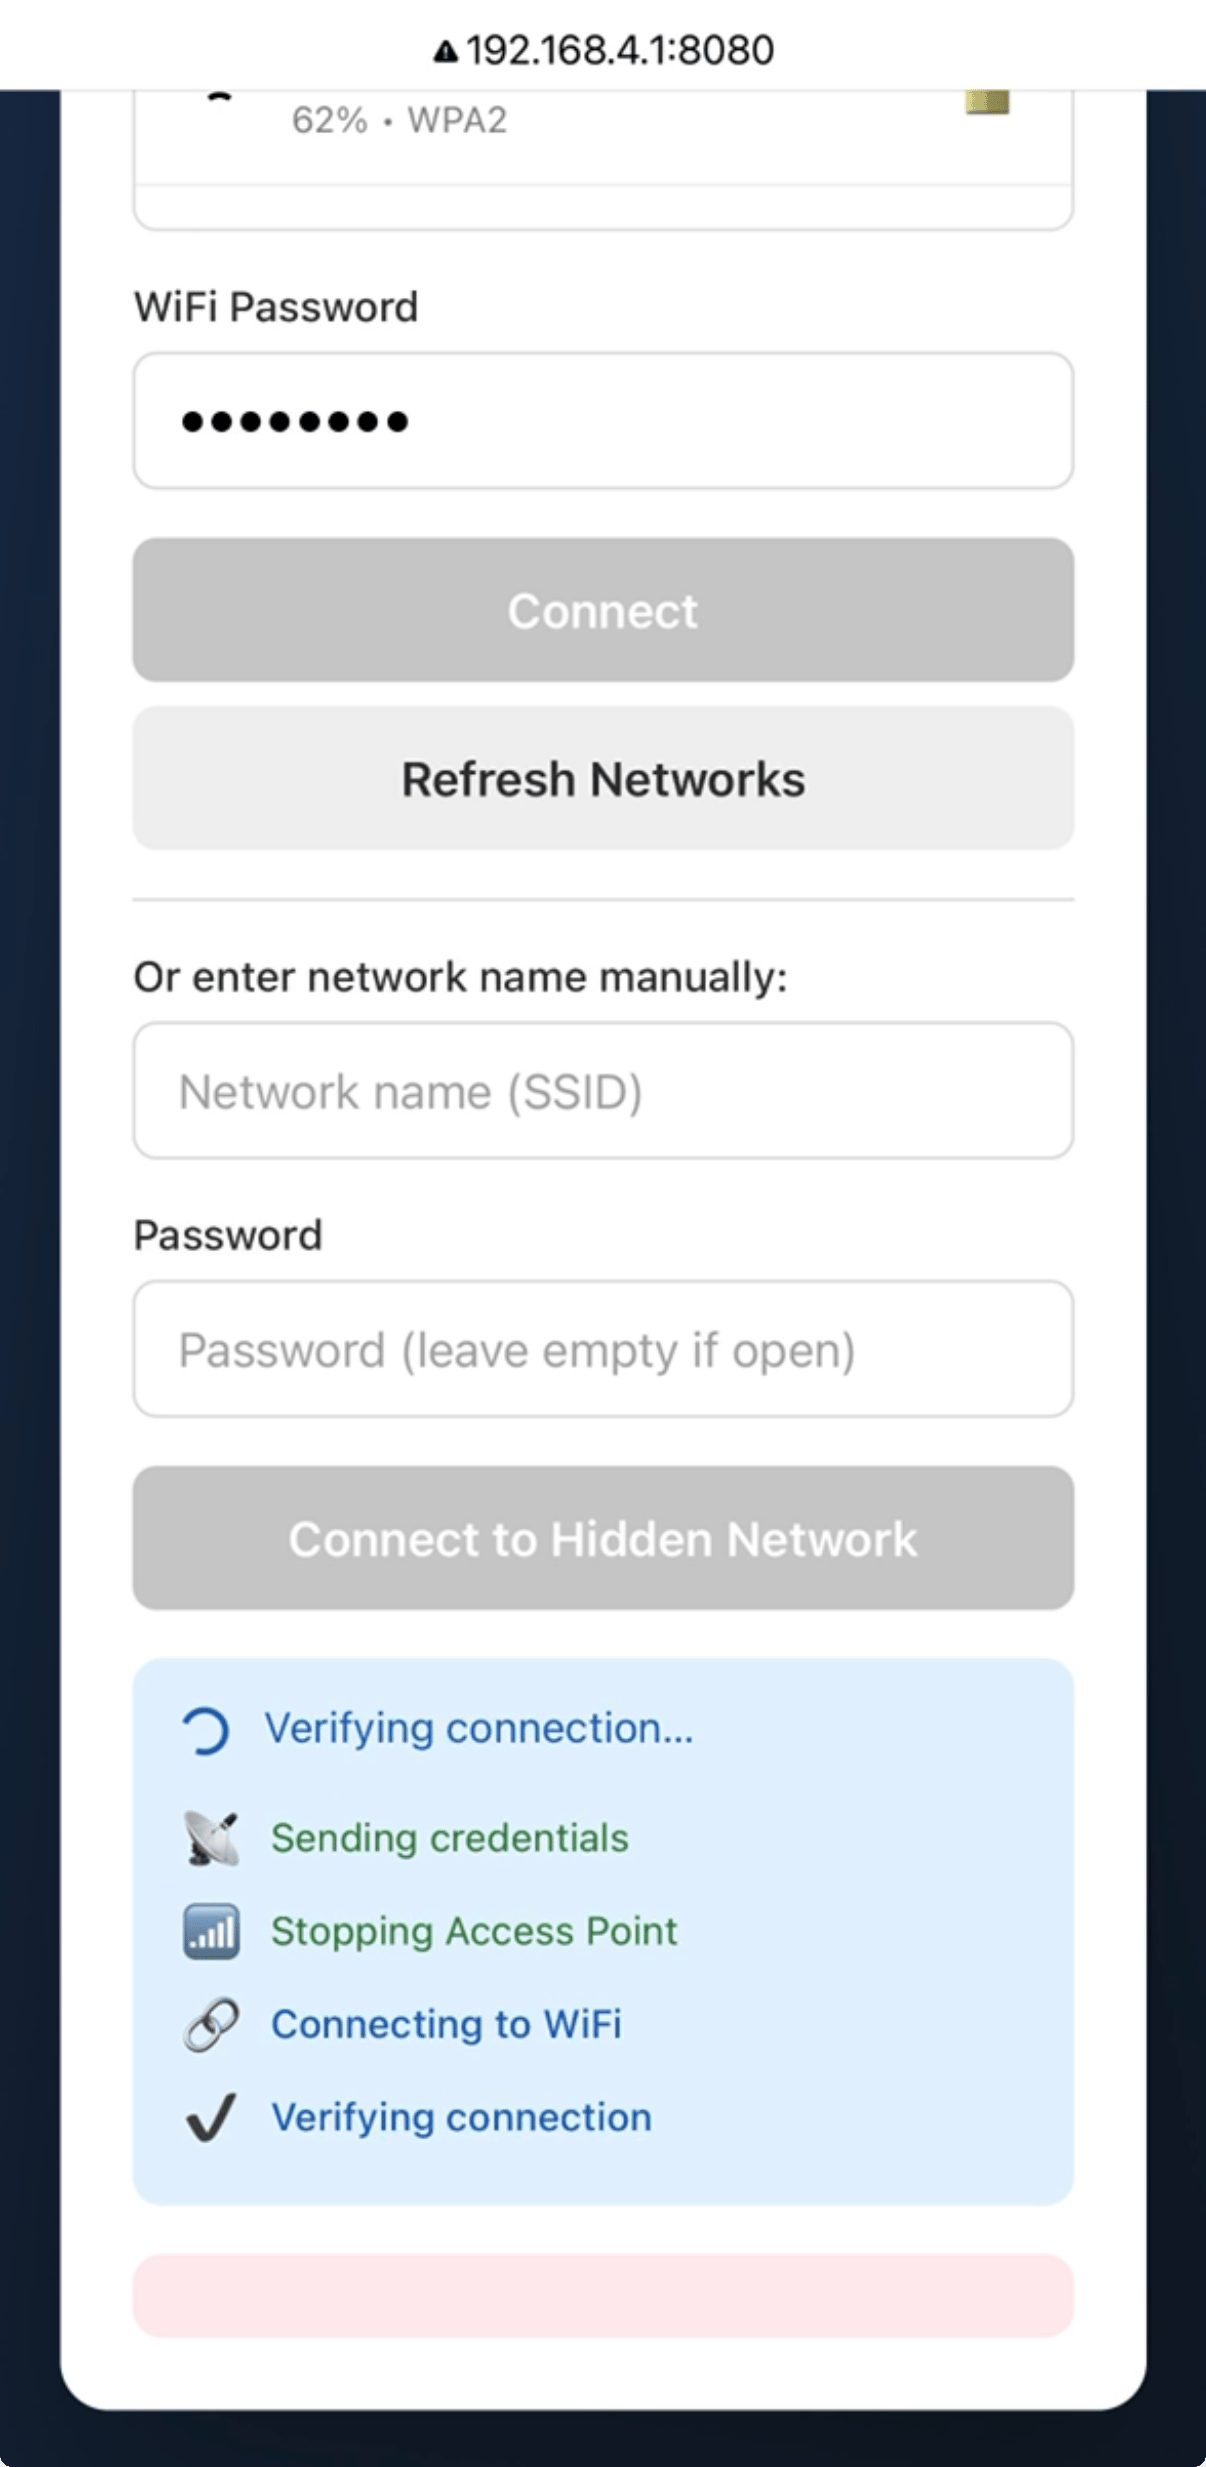
After reconnecting to your main network, the CBridge_Setup_XXXX network will disappear.
Accessing the C-Bridge Interface
Once the device is on your network, access the web interface from any browser on the same network:
http://cbridge-XXXX.local:3000— works on most networks with mDNS supporthttp://<device-ip>:3000— use this ifcbridge.localdoesn't resolve
Finding the device IP: Check your router or network switch's DHCP client table. The device hostname will appear as cbridge or cbridge.local.
Confirming Casambi Communication
Before handing over to software setup:
- Open the Casambi app on a mobile device connected to the same network
- Confirm the Casambi network is active
- Verify C-Bridge is within Bluetooth range (all devices visible in the Casambi app should be reachable)
Commissioning Checklist
Before proceeding to first-time software setup:
Device is securely mounted and does not move
The local interface is available and reports the expected status
Ethernet cable is connected and the link light is active on the switch
C-Bridge interface is accessible at cbridge.local or the device IP
Casambi network is confirmed active in the Casambi app
Troubleshooting Installation Issues
Device Not Powering On
- Verify the power supply matches the rating on your device label
- Try a different outlet or power cable
- Check for any LED activity — no LED at all means no power
Cannot Access cbridge-XXXX.local:3000
- Confirm your device is on the same network as C-Bridge
- Try accessing via IP address instead
- On Windows, install Apple Bonjour if mDNS isn't working
- Wait 2 minutes after boot before trying — the web service takes a moment to start
Poor Bluetooth Performance
- Reposition the C-Bridge unit closer to the centre of the space or closer to other Casambi devices
- Avoid placing it near metal objects, electrical panels, or Wi-Fi access points
Next Step
Once installation is confirmed, proceed to the First-Time Setup Guide to connect Casambi, import areas, and configure devices.